How to Reset E-bike Controller: Simple Troubleshooting
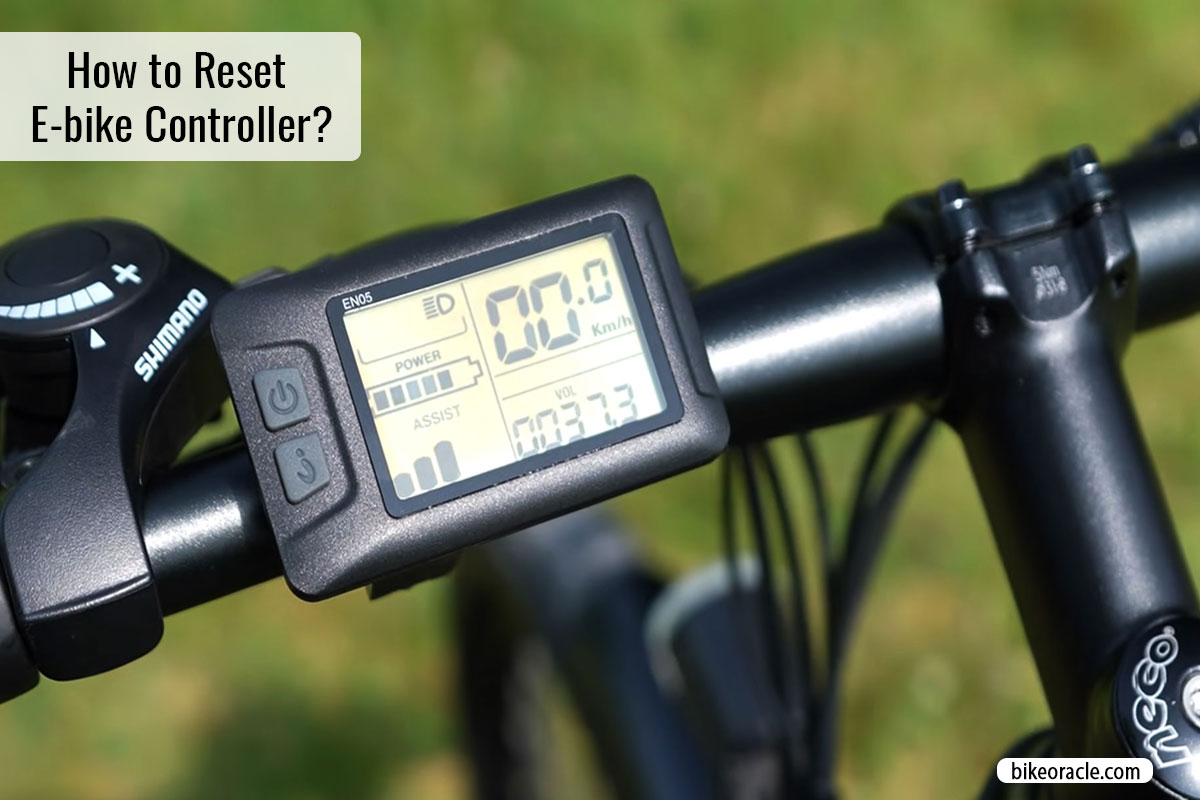
When it comes to resetting your e-bike controller, the process is straightforward. Locate the reset button or follow the manufacturer’s instructions for the reset combination on your controller, then execute the reset. Doing so will revert the controller settings to their factory defaults.
E-bikes have surged in popularity as an environmentally friendly mode of transportation, thanks to their electric motors. However, like any electronic device, e-bikes can experience issues that require troubleshooting. A common culprit is a malfunctioning controller.
The controller plays a pivotal role in managing the motor’s power and speed. In some cases, resetting the e-bike controller can effectively address problems like sudden power loss or erratic performance. Let’s walk you through the steps of resetting your e-bike controller to ensure optimal performance and functionality.
Why Reset Your E-Bike Controller?
Resetting your e-bike controller offers several advantages, including restoring factory settings, enhancing performance, and resolving issues. Discover how to reset your e-bike controller and elevate your riding experience.
Whether you’re an experienced e-bike rider or new to the electric bike realm, maintaining your e-bike controller’s condition is crucial for a smooth and enjoyable ride. As time passes, you may encounter various issues that a simple reset can resolve.
In this section, we’ll delve into common problems that resetting the controller can fix, indications that your e-bike controller might require a reset, and the benefits of doing so.
Common Problems Addressed by Resetting the Controller
Motor hesitation or power loss: At times, your e-bike may exhibit reduced power or hesitation during pedaling. Resetting the e-bike controller can recalibrate the system, ensuring optimal performance.
Error codes or warning messages: When error codes or warnings appear on your e-bike’s display panel, it may indicate a controller issue. Resetting the controller can often clear these messages and restore normal operation.
Unresponsive buttons or controls: If you’re dealing with unresponsive or malfunctioning buttons or controls on your e-bike’s display panel, a reset can rectify the problem. It refreshes the controller settings, allowing for proper button and control functionality.
Inconsistent speed or assistance levels: Inconsistent speed or assistance levels during your rides can be frustrating. A controller reset can recalibrate these aspects, delivering a smoother and more consistent riding experience.
Battery performance concerns: Resetting the e-bike controller can also help address battery-related issues. If you’ve noticed reduced battery life or inconsistent performance, a reset can optimize the controller’s communication with the battery, improving overall performance.
Resetting your e-bike controller can be a game-changer when it comes to troubleshooting these common issues and ensuring your electric bike performs at its best.
Identifying and Resolving E-Bike Controller Issues
E-bikes bring us the joy of effortless riding, but occasionally, they might exhibit unexpected behavior. Understanding when and how to reset your e-bike controller can be the key to restoring optimal performance.
Here are some crucial signs to watch for:
1. Sudden Power Output Changes: If your e-bike experiences abrupt power shifts, such as unexpected motor shutdowns or inconsistent power delivery, it’s a clear indication that a controller reset may be needed.
2. Mysterious Error Codes: Keep an eye on cryptic error codes or warning messages on your display panel. These often hint at underlying controller issues, making a reset a potential solution.
3. Unresponsive Controls: Frequent unresponsiveness from buttons or controls on your display panel suggests a controller reset may be necessary to regain full functionality.
4. Inconsistent Speed or Assistance Levels: If your e-bike’s speed or assistance levels fluctuate or don’t align with your settings, a controller reset can help restore consistency.
5. Rapid Battery Drain: A swiftly depleting battery or one that struggles to hold a full charge might be linked to a controller issue. Resetting the controller can improve battery performance.
The Benefits of Resetting Your E-Bike Controller
Resetting your e-bike controller isn’t just a troubleshooting measure; it can significantly enhance your overall riding experience:
1. Improved Performance: A reset eliminates hidden issues, ensuring a smoother and more enjoyable ride.
2. Enhanced Battery Life: Optimizing communication between the controller and battery can extend your rides without worrying about power depletion.
3. Cost-Effective: Resetting often resolves controller-related problems without costly repairs or replacements, saving you money.
4. Peace of Mind: Knowing your controller operates optimally lets you focus on your ride without worry.
5. Overall Enhancement: A reset ensures all components work together seamlessly, providing responsive controls, consistent power, and a reliable battery.
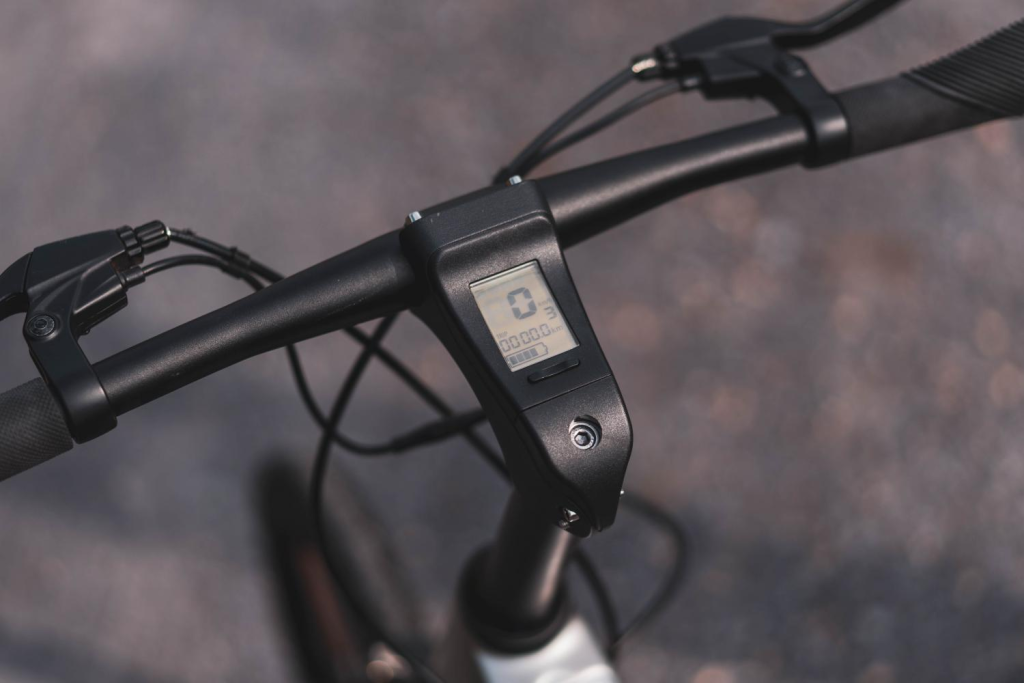
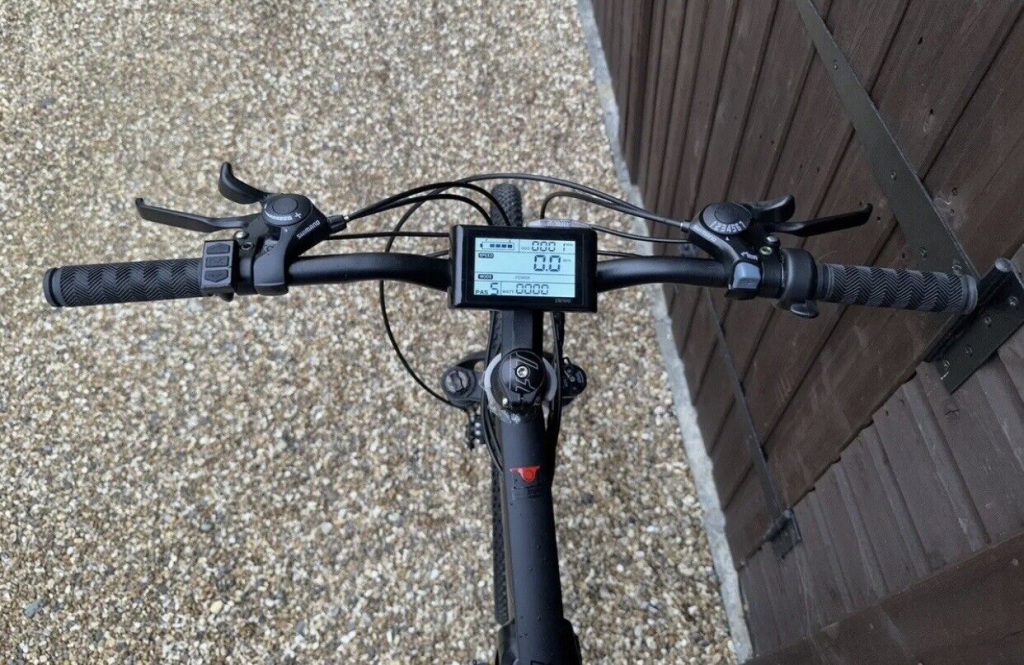
Understanding Your E-Bike Controller
To effectively troubleshoot and maintain your e-bike, it’s essential to understand its controller and components:
– Motor Controller: The central component controlling speed and power output, communicating with the battery and sensors.
– Throttle: Allows manual control of power output.
– Brake Sensors: Detect brake use and cut power to ensure safe braking.
– PAS Sensors: For pedal-assist bikes, these sensors detect pedaling and adjust motor assistance.
– Display: Provides essential information such as speed, battery level, and distance traveled.
– Connectivity: Ensures seamless communication between components.
Resetting Your E-Bike Controller: A Step-by-Step Guide
Resetting your e-bike controller is straightforward, but precautions are crucial:
Power Off: Ensure your e-bike is completely powered off to prevent accidents.
Read the Manual: Familiarize yourself with your e-bike’s manual for specific reset instructions.
Note Settings: If your controller has customizable settings, record them before resetting.
Consult Professionals: If uncertain, seek guidance from professionals or the manufacturer’s support.
Reset Process
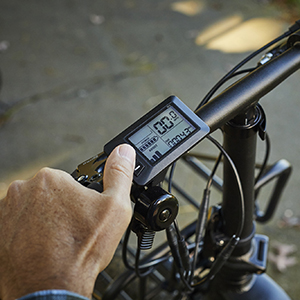
Locate Reset Button: Find the reset button, usually on the controller or near the battery.
Power Off: Confirm your e-bike is entirely powered off.
Press Reset Button: Use a small pointed object like a paperclip to press and hold the reset button for a few seconds.
Release and Power On: After the specified duration, release the reset button and power on your e-bike.
Test Controls: Ensure the controller functions correctly by testing throttle, pedal-assist, and display functions.
What If the Reset Doesn’t Work?
If the reset doesn’t resolve the issue, consider these steps:
- Review Instructions: Verify you followed the correct reset procedure.
- Contact Support: Reach out to the manufacturer’s customer support for further guidance.
- Consult Professionals: Seek assistance from authorized service centers or e-bike technicians for complex issues.
Prioritize safety and follow precautions when dealing with e-bike electrical components.
Common Issues That May Arise After Resetting The Controller:
Reduced Power Output: If you notice a decrease in power after resetting the E-Bike controller, several potential causes should be considered. To troubleshoot this issue:
- Check the battery level to ensure it’s adequately charged.
- Inspect the motor for damage or loose connections.
- Confirm that the throttle is functioning correctly and not stuck in a lower power mode.
- Examine the wiring connections between the controller, motor, and battery for any loose or damaged wires.
Inconsistent Speed Control: After a controller reset, you may experience erratic speed control. To address this issue:
- Examine the throttle to ensure it operates smoothly without sticking or resistance.
- Verify that the speed control settings on the E-Bike display or controller are correctly configured.
- Inspect the wiring connections between the controller and the throttle for any loose or damaged wires.
Error Codes on Display: Error codes displayed on the E-Bike controller post-reset can indicate specific issues. To troubleshoot error codes effectively:
- Refer to the user manual or the manufacturer’s website to identify the meaning of the error code.
- Follow the recommended steps to resolve the error code if within your capability.
- If the error persists or you’re unsure how to address it, consult a professional technician experienced in E-Bike controller repairs.
Effective Troubleshooting Steps:
- Familiarize Yourself with E-Bike Components: A comprehensive understanding of your E-Bike’s various parts, including the controller, motor, throttle, and battery, can facilitate problem identification.
- Visual Inspection: Carefully scrutinize your E-Bike’s physical components for visible damage, loose connections, or signs of wear and tear. Address minor issues such as loose wires or connectors before proceeding.
- Battery Testing: Ensure the battery is fully charged and operating correctly. If you suspect a battery issue, consider testing it with a voltmeter or consulting a professional for assistance.
- Controller Settings Review: Review the controller settings on your E-Bike display or controller to ensure they align with your preferences. Adjust any settings that may be causing the issues you’re encountering.
- Utilize User Manuals and Online Resources: Consult the user manual provided by the manufacturer or search online for troubleshooting guides specific to your E-Bike model. These resources often offer step-by-step instructions for resolving common issues.
When to Seek Professional Assistance:
While many E-Bike controller problems can be resolved through troubleshooting, there are circumstances where professional help is warranted.
Consider professional assistance if:
- You cannot identify the issue or its resolution.
- The problem involves complex electrical repairs or software programming beyond your technical abilities.
- Your E-Bike is still under warranty, as attempting repairs yourself might void the warranty.
- The issue poses safety risks or threatens the integrity of your E-Bike’s components.
By following these troubleshooting guidelines and knowing when to seek professional assistance, you can effectively address common issues that may arise after resetting your E-Bike controller. Remember, regular maintenance and proper usage can also prevent future problems and ensure a smooth riding experience.
Preventing Frequent Controller Resets Through Maintenance
To minimize the need for frequent E-Bike controller resets, adhere to these essential maintenance practices. Learn how to reset your E-Bike controller and maintain its smooth operation without disruptions.
Effective E-Bike Controller Maintenance Practices
Maintaining your E-Bike controller is crucial for its smooth functioning and to prevent the need for frequent resets. By following these straightforward best practices, you can extend your controller’s lifespan and enjoy uninterrupted rides on your E-Bike.
Regular Cleaning and Inspections to Prevent Issues:
- Keep it Clean: Dust and dirt accumulation on the controller can affect its performance. Regularly wipe the controller with a soft, dry cloth to remove debris.
- Check for Loose Connections: Vibrations and regular use can lead to loose connections over time. Inspect the wiring and connectors of your E-Bike controller for signs of wear or looseness.
- Tighten Screws and Bolts: Loose screws and bolts can cause vibrations and compromise the controller’s integrity. Periodically check and tighten all screws and bolts to ensure everything is secure.
Tips for Extending Controller Lifespan:
- Avoid Extreme Temperatures: Exposing your E-Bike controller to extreme heat or cold can affect its performance and shorten its lifespan. Store your E-Bike in a temperate environment whenever possible.
- Protect from Water and Moisture: Water and moisture can damage the controller’s internal components. Always shield your E-Bike controller from direct exposure to rain or water splashes.
- Minimize Overloading: Excessive load on the motor can strain the E-Bike controller. Adhere to recommended weight limits and avoid carrying heavy loads that exceed your E-Bike’s capacity.
- Maintain Proper Battery Levels: A low battery can strain the E-Bike controller unnecessarily. Regularly charge your battery to the recommended levels for optimal performance.
By adhering to these best practices and regularly maintaining your E-Bike controller, you can reduce the likelihood of frequent resets and ensure a longer lifespan for your E-Bike’s electronic system. Remember, a well-maintained controller leads to a smoother and more enjoyable ride on your E-Bike.
Elevating Your E-Bike Experience: A Guide to Controller Upgrades
Is your e-bike not living up to its former glory? Are you on a quest to elevate your cycling adventure? Look no further, as upgrading your e-bike controller may be the key. In this section, we delve into the advantages of upgrading your controller, the considerations for selecting the right one, and the installation process, along with potential challenges to anticipate.
Benefits Of Upgrading The Controller:
1. Enhanced Performance: An upgraded e-bike controller can breathe new life into your ride, offering smoother acceleration, improved torque control, and a boost in top speed.
2. Prolonged Battery Life: A revamped controller can optimize your e-bike’s power consumption, translating to extended battery life. Say goodbye to range anxiety and enjoy longer rides.
3. Customization Galore: Modern e-bike controllers often feature advanced options for tailoring your riding experience. This could include adjustable power settings, regenerative braking, and even integration with smartphone apps.
Factors To Consider When Choosing A New Controller:
1. Compatibility: Ensure the new controller aligns with your specific e-bike model. Consult the manufacturer’s recommendations or seek expert advice if you’re unsure.
2. Power and Performance: Examine the power rating and performance capabilities of the new controller. Ensure it suits your preferred riding style and needs.
3. Budget: Establish a budget for your upgrade and seek options that offer the best value over the long term, not just the initial cost.
4. User-Friendliness: Opt for a controller that’s user-friendly and intuitive. Features like a clear display, easy-to-use buttons or touchscreens, and straightforward programming are desirable.
5. Warranty and Support: Verify that the manufacturer provides a warranty for the new controller and has reputable customer support in case you encounter issues.
Installation Process And Potential Challenges:
While installing a new e-bike controller, it’s essential to note that it might demand some technical know-how and tools. If you’re not experienced with electrical components, it’s wise to seek professional assistance. Here are potential challenges you might encounter during the installation:
1. Wiring Compatibility: Ensure that the wiring connectors of the new controller match those on your e-bike. Modifications or adapter cables may be required if they don’t align.
2. Firmware Compatibility: Check if the new controller necessitates firmware updates and whether it’s compatible with your e-bike’s existing electronics. Incorrect firmware updates can lead to issues, so follow the manufacturer’s instructions carefully.
3. Physical Fitment: Make sure the new controller fits seamlessly within your e-bike’s available space without interfering with other components. Measure the dimensions and cross-reference them with your e-bike’s specifications.
Frequently Asked Questions Of How To Reset E-Bike Controller
1. How Do I Reset My E-Bike Controller?
To reset your e-bike controller, locate the reset button and press it for a few seconds. This action will reboot the controller to its default settings, resolving any operational issues.
2. Why Is It Necessary To Reset The E-Bike Controller?
Resetting the e-bike controller becomes necessary when issues like incorrect speed readings, malfunctioning throttles, or unresponsiveness arise. It serves as a troubleshooting step to restore the controller’s functionality for a smooth and dependable ride.
3. Will Resetting The E-Bike Controller Delete My Settings?
Yes, resetting the e-bike controller will erase any customized settings you’ve configured. However, it won’t impact the overall performance or functionality of the controller. You can simply reconfigure your desired settings after the reset.
4. How Often Should I Reset My E-Bike Controller?
Resetting your e-bike controller should only be done when you encounter issues or experience abnormal behavior. There’s no need for regular resets. Proper maintenance and care can reduce the need for frequent resets.
Conclusion
Resetting an e-bike controller may seem daunting, but armed with the right knowledge and steps, it becomes a manageable process.
Following these guidelines will lead to a restored e-bike controller, allowing you to continue your rides with confidence.
Remember, proactive maintenance and troubleshooting are key to a prolonged and enjoyable e-bike experience.
![How Fast Does a 2000W Electric Bike Go? [Answered]](https://bikeoracle.com/wp-content/uploads/2023/10/How-Fast-Does-a-2000W-Electric-Bike-Go-768x512.jpg)
![How Fast Can a 36V Electric Bike Go? [Answered]](https://bikeoracle.com/wp-content/uploads/2023/10/How-Fast-Can-a-36V-Electric-Bike-Go-768x512.jpg)